
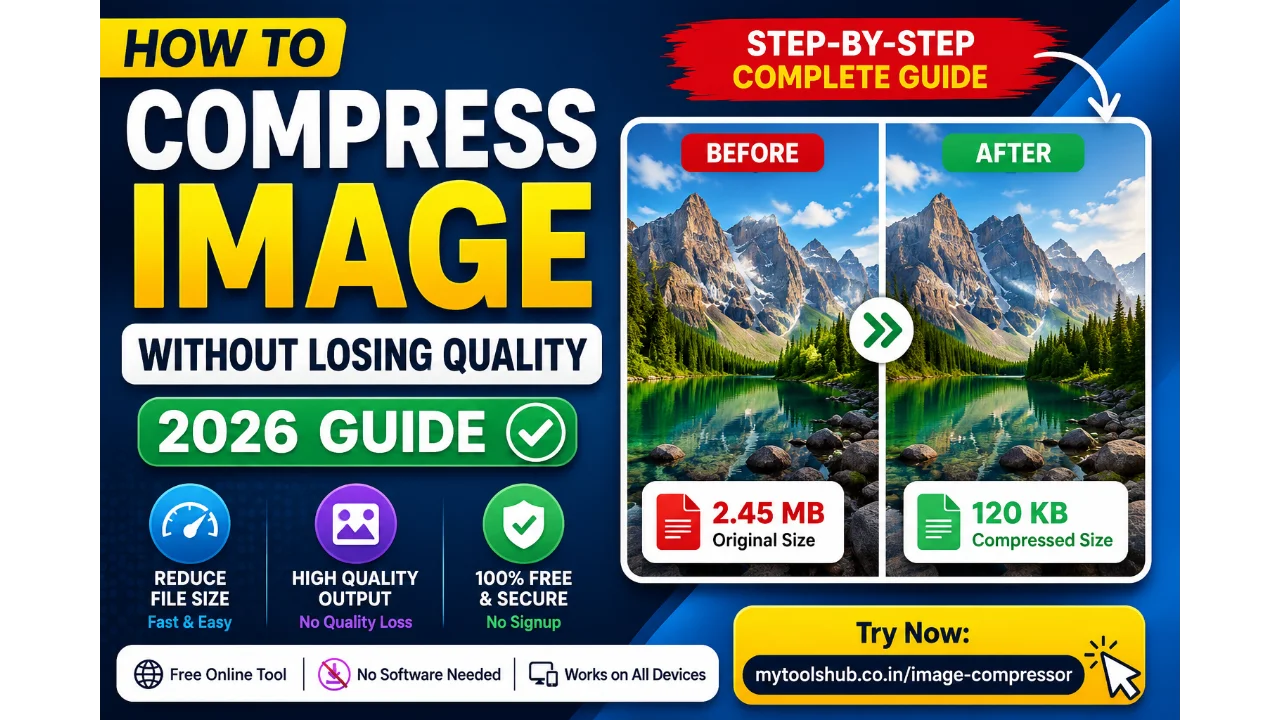
How to Compress Image Without Losing Quality (2026 Guide)
By Samir | Published: June 19, 2026
Ever had this happen — you needed to upload a photo for a college form, and the site said "File size too large, max 200KB allowed"? Or you're publishing a blog post and the images are so heavy the page takes 8-10 seconds to load?
If yes, you're not alone. This problem hits almost everyone — whether you're a student, a blogger, or a small business owner managing your own website. The good news is the fix is actually quite simple, you just need to understand how image compression really works.
In this guide, we'll go step by step through how to compress an image without ruining its quality, which method to use when, and the mistakes people commonly make. And yes, I'll also share a free tool that I personally recommend.
Table of Contents
- Why Image Compression Matters So Much
- What Is Image Compression
- Lossy vs Lossless Compression
- Who This Guide Is For
- Real Problems That Happen Without Compression
- Step-by-Step: How to Compress an Image Using the Tool
- Tips & Tricks to Maintain Quality
- Common Mistakes to Avoid
- Pro Tips
- FAQ Section
- Conclusion
Why This Matters: Why Image Compression Matters So Much
In 2026, internet speeds have gotten a lot better, but so have expectations. Google now directly judges how fast your website loads through Core Web Vitals, and images are the biggest factor in that.
Think about it simply: if a single page on your blog is 5MB just because of images, it becomes hard for mobile-data users to even open that page. The result? They bounce, and Google picks up the signal that your site is slow — which directly hurts your ranking.
On the other hand, if that same image is properly compressed without losing quality, the page can load in 1 second instead of 5. That one small change creates a massive difference — better user experience, better SEO, and lower server costs.
What is Image Compression
In simple terms: image compression is the process of reducing an image's file size so it takes up less storage, uploads faster, and loads faster — without making the photo look worse.
When you take a photo with a camera or phone, the file stores a huge amount of raw data — color information for every pixel, unnecessary metadata, and high-resolution detail that's often more than you actually need. Compression smartly removes this extra data in a way the human eye can't really notice, while the file size drops significantly.
It's a lot like packing your stuff into a vacuum-sealed bag inside a big suitcase — everything's still there, it just takes up less space.
Lossy vs Lossless Compression — When to Use Which
This is the most important concept everyone should understand. Compression comes in two types, and each has a different use case.
Lossy Compression
Here, some image data is permanently removed so the file size can shrink a lot. JPEG format is built on this technique. If the compression level is kept moderate, the quality difference is invisible to the naked eye, but the file size can drop by 70-90%.
When to use it: Website images, blog photos, social media uploads, product photos — anywhere a slight bit of compression isn't visible but speed matters most.
Lossless Compression
Here, no image data is lost at all — the file size shrinks just by removing unnecessary metadata and redundant information. Quality stays 100% identical to the original, but the compression ratio isn't as high as lossy (usually a 20-40% reduction).
When to use it: Logo design, professional photography portfolios, medical images, or anywhere every pixel matters and even a slight quality loss isn't acceptable.
For about 90% of regular users — students, bloggers, online form uploads, social media — lossy compression is usually the best choice, since there's no visible difference and the file size drops drastically.
Here's a simple analogy: lossless compression is like cleaning your room — everything's still there, just neatly arranged, so it takes up less space. Lossy compression is a bit different — it's like removing some stuff you don't actually need, which frees up a lot more space, but the important things stay.
For people doing professional photography or using images for print quality, lossless is the better option. But for people using images just for screens, websites, or online forms, lossy compression is the practical, efficient choice.
Who Should Use This: Who This Guide Is For
- Students: Filling out college/university forms where a photo, signature, or document has a fixed size limit (like 50KB, 100KB, 200KB).
- Bloggers & Content Creators: Uploading images to their website and wanting to improve page speed.
- Small Business Owners: Adding product photos to an e-commerce site and wanting to keep loading time low.
- Job Seekers: Uploading resumes, photos, or certificates to online portals.
- Social Media Users: Wanting to share high-quality photos without the platform's auto-compression ruining the quality.
Real Problems That Happen Without Compression
Let's look at some real-life examples that may have happened to you too:
1. Upload Errors From Large File Sizes
A student, Priya, was filling out her admit card form. While uploading her photo, an error showed up: "File size exceeds 100KB limit." The photo from her phone camera was 3.2MB. Without the right tool, she resized the photo herself, which made the quality so bad it looked blurry.
2. Slow Website Loading
A blogger used to put 8-10 high-resolution photos in every post on his travel blog, each one 4-5MB. The result: his page took 12 seconds to load, and Google Search Console showed a "Poor" Core Web Vitals score. His organic traffic kept dropping.
3. Email Attachment Limits
Many people attach photos to professional emails — a portfolio, documents, or reports. If the images are too large, the email bounces or the attachment fails.
4. Running Out of Storage Space
Phone or cloud storage fills up because every photo is unnecessarily large, when the same quality could've been maintained at a much smaller size through compression.
5. Slow Performance in Apps and Websites
A small business owner, Rohit, was adding new products to his e-commerce site. Each product had 5-6 photos at the original camera resolution, with no compression at all. The site became so slow that customers left before even reaching the cart. After he compressed and re-uploaded the images, page load time dropped by 70% and his conversion rate improved too.
All of these problems have one simple solution — using the right compression technique. You can easily compress your image with this free online Image Compressor tool, which keeps the quality intact while drastically reducing file size.
Step-by-Step: How to Compress an Image Using the Tool
Now let me walk you through the exact steps to compress any image — JPEG, PNG, or WebP — in a matter of seconds, without downloading any software.
- Step 1: First, open https://mytoolshub.co.in/image-compressor/ in your browser — it works on both mobile and desktop.
- Step 2: Click the "Upload Image" button and select the file you want to compress.
- Step 3: The tool will automatically analyze the image and suggest the best compression settings to preserve quality.
- Step 4: If you need a specific file size (like 50KB or 100KB for a form), you can adjust the compression level.
- Step 5: Check the preview — compare the original and compressed image side by side to confirm the quality looks right.
- Step 6: Click the "Download" button and save the compressed image to your device.
The whole process takes less than 30 seconds, and the best part is it's completely free and doesn't require creating an account.
Tips & Tricks to Maintain Quality
- Choose the right format: JPEG for photos, PNG for images that need a transparent background, and WebP if website speed is the top priority.
- Check resolution first: If your image is for a website and the display size is 800px, there's no point uploading a 4000px resolution image — resize first, then compress.
- Use batch compression: If you need to compress multiple images at once, look for a tool that supports batch processing to save time.
- Keep compression level at 70-85%: This is the sweet spot where the file size drops significantly but quality still looks the same to the eye.
- Always preview before downloading: After compressing, zoom in once to check that text or fine details aren't getting blurry.
JPEG vs PNG vs WebP — Typical File Size Comparison
To make the format choice concrete, here's roughly how the same 1920×1080 photo compares across formats and compression settings (actual results vary by image content, but this gives a realistic sense of scale):
| Format | Typical Size (uncompressed) | After Compression (85% quality) | Best For |
|---|---|---|---|
| JPEG | ~4-6 MB | ~400-700 KB | Photos, no transparency needed |
| PNG | ~6-10 MB | ~1.5-3 MB | Logos, graphics, transparency |
| WebP | N/A (compressed format) | ~300-500 KB | Websites, fastest load times |
The gap between PNG and the other two formats is the part people most often get wrong — PNG's lossless compression means a busy, colorful photo saved as PNG can end up several times larger than the same photo saved as JPEG, with no visible quality benefit for a photograph specifically.
Pro Tips
- Test multiple formats: Compress the same image as both JPEG and WebP and compare — WebP is usually 25-30% smaller at the same quality.
- Strip metadata: Photos carry camera info, location data, and other metadata that's invisible but adds to file size. A good compression tool removes this automatically.
- For specific size targets: If you need an exact size like 50KB or 100KB (a common requirement for government forms), use a tool that lets you set the target size directly, instead of guessing.
- Combine with lazy loading on your website: Don't just compress — enable lazy loading too, so images only load when the user scrolls to them.
- Audit regularly: If you're a blogger, periodically check and re-compress images on older posts too, since compression algorithms keep improving over time.
Test all your images — try different formats and see which gives the best result for your use case. A little experimentation will help you find your ideal settings.
How to Choose the Right Compression Tool
There are plenty of image compressor tools out there, but they're not all equal. Some destroy quality too aggressively, some are slow, and some come with hidden charges or watermarks. Here's what to check for:
- No quality compromise by default: The tool should use a smart algorithm that automatically finds the best balance between file size and quality.
- Multiple format support: JPEG, PNG, WebP — all three should be supported, so you don't need to hunt for different tools.
- Fast processing: If a tool takes minutes to compress an image, it's not practical for daily use.
- No installation required: A browser-based tool is best since you don't need to download or install any software, and it works on mobile too.
- Privacy friendly: A good tool doesn't permanently store your images — it deletes them after processing.
Keeping all these criteria in mind is exactly why I recommend mytoolshub.co.in's Image Compressor in this guide — it's free, fast, and gives a reliable result without needing any extra technical knowledge.
FAQ Section
1. How much does compressing an image hurt its quality?
If you use moderate compression (70-85%), the quality difference is invisible to the naked eye. Visible blurriness only shows up with very heavy compression (like 20-30%).
2. What's the difference between JPEG and PNG for compression?
JPEG is best for photos since it uses lossy compression and gives a much smaller file size. PNG is better for transparent backgrounds or graphics/logos, but the file size is usually larger.
3. Is it safe to use a free online tool?
Yes, as long as the tool is reputable and doesn't permanently store your images on its server. A good tool deletes images after processing and gives you a direct download.
4. How do I get an image to an exact KB size for a form?
Use a tool that lets you manually set a target file size (like "compress to under 50KB"). It automatically achieves the specified size with the best possible quality.
5. Can I compress multiple images at once in bulk?
Yes, many modern tools support batch compression, letting you upload and compress several images at once — which saves time, especially for bloggers and businesses.
Conclusion: Time to Take Action
Image compression isn't some complicated technical skill — you just need to understand the difference between lossy and lossless, and when to use which. Whether you're a student filling out a form, a blogger trying to improve website speed, or a business owner sharing professional images — the right compression technique can save you a lot of time and frustration.
The most important thing is you don't need to manually adjust settings every time — a good tool handles all of that automatically. If you want to try it right now, head to https://mytoolshub.co.in/image-compressor/ and compress your first image for free — no signup, no software download, just a result in seconds.
Next time you hit an upload error or your website feels slow because of images, remember — the solution is just one click away.
Written by Samir
Comments (0)
Leave a Comment