How to Take a Passport Photo at Home That Won't Get Rejected (2026)

How to Take a Passport Photo at Home That Won't Get Rejected (2026)
How to Take a Passport Photo at Home That Won't Get Rejected (2026) | MyToolsHub

How to Take a Passport Photo at Home That Won't Get Rejected (2026)

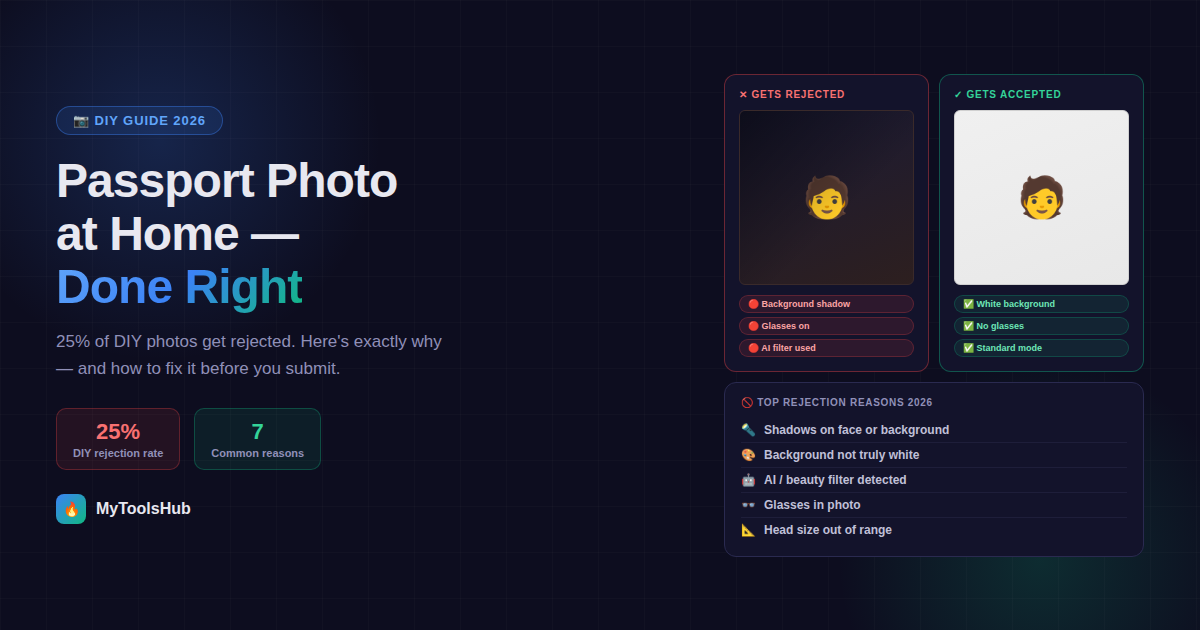
Taking your own passport photo at home should be simple. It's one photo, taken with the camera already in your pocket. But DIY passport photos fail roughly 25% of the time on the first submission — not because the rules are complicated, but because a handful of very specific issues trip up almost every home attempt: shadows that don't look like shadows until the automated system flags them, a background that appears white in your kitchen but photographs as cream, head proportions that look right to the eye but fall outside the accepted measurement range.

This guide works through each of those failure points — what causes them, why the system rejects them, and exactly how to fix them before you submit. Starting with the problem rather than a generic requirements list means you spend your time on the things that actually cause rejections, not on rules you'd naturally get right anyway.

👉 Use our free Passport Photo Maker — crop to exact specs for 20+ countries, adjust background, instant download. No upload to any server.

The 7 Reasons Home Passport Photos Get Rejected

#1 Most Common Shadows on the Background or Face
Automated passport photo systems check for uniform background illumination. Shadows — even subtle gradient shadows from standing too close to the wall — disrupt the background uniformity check and trigger an automatic flag. Shadow across a cheek changes the apparent shape of your face and can fail biometric checks years later at border crossings.
Fix: Stand at least 2–3 feet away from the background. Place your light source directly in front of you, not to the side or above. A large window facing you works better than any overhead light. Take a test shot and zoom in — look specifically at the background behind your head and shoulders for any darker areas.
#2 Very Common Background That Isn't Actually White
A wall that looks white in person frequently photographs as grey, cream, or warm yellow under indoor lighting. The automated system checks background color against a strict white threshold. Light grey passes in some countries (UK) but fails for US, India, Canada, Australia, and most others that require pure white (#FFFFFF or close).
Fix: Use a plain white sheet or white poster board if your wall photographs off-white. After shooting, zoom in on the background on a proper screen — not just your phone — and check the actual color. If it looks even slightly warm or grey, reshoot with different lighting or a physical white surface behind you.
#3 Common Incorrect Head Size / Proportions
For US passport photos, the head must measure between 1 inch and 1⅜ inches from chin to crown within a 2×2 inch frame — meaning your head should fill 50–69% of the image height. This is a narrow range. Standing too far away makes the head too small; cropping too tight makes it too large. Both are rejected.
Fix: Don't eyeball it. Use a passport photo tool that applies a positioning guide automatically. If measuring manually, use a ruler on the printed photo — a photo that looks correctly sized on screen can still fall outside the 1–1⅜ inch range when printed.
#4 Automatic Rejection Wearing Glasses
The US State Department has prohibited glasses in passport photos since 2016 — no exceptions without a physician's signed statement on official letterhead. This applies to all eyewear including clear lenses, contacts with visible tinted rims, and fashion glasses. Any glasses mean automatic rejection.
Fix: Remove all glasses before taking the photo. If you wear prescription glasses and have a medical need to include them, get a signed physician's statement before submitting — but the State Department website notes this exception is rarely granted.
#5 2026 New Rule AI Filters, Beauty Mode, Portrait Mode
The US State Department significantly expanded its ban on AI-enhanced photos in January 2026. This now includes smartphone beauty modes (skin smoothing, blemish removal), portrait mode background blur, AI-generated backgrounds, and photo editing filters. Automated systems now detect AI processing signatures and reject affected photos immediately.
Fix: Before taking your photo, go into your phone's camera settings and turn off: Beauty mode, Portrait mode, Smart HDR that alters skin tones, and any AI enhancement features. Shoot in standard photo mode only. Don't use beauty filters in any editing app afterward — even light retouching is grounds for rejection.
#6 Common Wrong Expression or Eyes Not Fully Open
A wide smile that partially closes the eyes shifts facial geometry in ways biometric systems flag as non-standard. Squinting, raised eyebrows, tilted head, or looking slightly away from the camera all cause problems. Even a subtle tilt that looks natural in a casual photo fails biometric alignment checks.
Fix: Look directly into the lens (not the screen) with a relaxed, neutral expression. Eyes fully open, mouth gently closed. Think of it as a "resting face" shot rather than a posed photo. Take multiple shots and choose the one where your gaze is straightest and eyes are most open.
#7 Easy to Miss File Size or Format Issues (Digital Submissions)
For online passport applications, each country's portal has strict file requirements. The US online renewal portal requires JPEG format, 600×600 to 1200×1200 pixels, under 10MB. India requires 10KB–300KB — a modern phone photo at 3–5MB needs 90%+ compression to comply. Wrong file format or size causes instant rejection at the upload stage.
Fix: Don't submit the raw photo file from your phone. Use a passport photo tool that outputs the correct format and file size for your country automatically. If compressing manually, always check the final file size before uploading — India's 300KB limit in particular catches many people off guard.

The Complete Photo Setup — What You Actually Need at Home

You don't need professional equipment. You need to solve for the three things that trip up most home setups: lighting, background, and camera stability. Here's exactly what works:

Lighting

The goal is even, diffused light directly in front of your face with no light source behind or to the side of you. The easiest setup that consistently works:

  • Stand facing a large window during the day — mid-morning or late afternoon light is best (direct noon sunlight is too harsh and creates hard shadows under the nose and chin)
  • If using artificial light, place two lamps on either side of the camera at roughly the same height as your face — this reduces facial shadows that a single lamp creates
  • Stand far enough from the background (at least 2–3 feet) that no shadow from your head or body falls on the wall behind you
  • Take a test shot and check: zoom into your cheeks and forehead for shadows, and zoom into the background behind your ears and shoulders for shadow gradients

Background

A real white surface is more reliable than relying on your wall. Options that work:

  • A white bed sheet taped to a wall (flat, no wrinkles)
  • A white foam board or poster board from any stationery shop
  • A white wall that you've verified photographs as pure white — check this before taking the actual photo, not after

What doesn't work reliably: off-white walls, cream-painted rooms, walls with any texture, wooden paneling, and any surface with a pattern regardless of how subtle.

Camera and Stability

  • Use your phone's rear camera — it's higher quality than the front-facing camera
  • Set a timer and prop the phone at eye level on a stack of books, a tripod, or any stable surface — handheld selfies introduce tilt that's hard to avoid
  • Take 5–8 shots and pick the sharpest one with the most direct eye contact
  • Turn off portrait mode, beauty mode, and all AI enhancement before shooting
  • Shoot in good light rather than bumping up ISO in dim conditions — grainy photos can fail quality checks

Country-Specific Rules You Need to Know

Most rejection guides focus on US requirements, but the rules vary meaningfully by country. Here are the most important differences:

CountrySizeBackgroundKey Difference
United States2×2 inches (51×51mm)Plain white or off-whiteAI-enhanced photos banned since Jan 2026; glasses prohibited
United Kingdom35×45mmLight grey or cream — NOT whiteUK is one of very few countries that rejects pure white backgrounds
India2×2 inches (51×51mm)Plain whiteFile size 10KB–300KB — most phone photos need heavy compression
Canada50×70mm (unique size)Plain whiteRequires guarantor signature on back of one copy; no DIY digital option
Schengen / EU35×45mmWhite or light greyBackground rule varies slightly by country within Schengen
Australia35×45mmPlain white or off-whiteMinimum 900×1125 pixels for digital submissions
The UK is the most important country-specific rule to know: it requires a light grey or cream background, not white. Submitting a white-background photo for a UK passport is one of the most common cross-country mistakes — and the rejection reason isn't obvious unless you already know this.

The Pre-Submission Checklist — Run This Before You Upload

Go through every item below before submitting. Most rejections are caused by things that are visible in the photo before it's submitted — they just aren't caught because people don't check systematically.

Background color: Zoom into the background area of the photo on a screen (not a phone). Does it look genuinely white? Or slightly warm, grey, or cream? If uncertain, reshoot against a physical white surface.
Background shadows: Check behind your head, behind both ears, and around your shoulders. Any darker area — even a subtle gradient — is a shadow that will get flagged.
Head size: Is your head filling roughly 50–69% of the image height? Not too small (too much empty space above head) and not cropped too tight (chin near the bottom edge)?
Glasses: None. Even clear lenses are grounds for rejection in most countries.
Expression and gaze: Eyes fully open, both eyes visible, looking directly at the lens (not the screen). Neutral expression or very slight closed-mouth smile.
Filters and AI: Was the photo taken in standard camera mode with all beauty/portrait modes off? Have you applied any editing afterward? If yes to editing, retake.
File format and size: Is the file a JPEG? Is the file size within your country's limit? (India: under 300KB, US online renewal: under 10MB, DS-160: under 240KB)
Photo age: Was this photo taken within the last 6 months? Photos older than 6 months are rejected regardless of quality.

What to Do If Your Photo Gets Rejected After Submission

A photo rejection doesn't cancel your application — it pauses it until you resubmit a compliant photo. The key is understanding exactly what was flagged so you fix the right thing and don't get rejected again.

When you receive a rejection notice, it will typically include a specific reason or code. Match it directly to the issue rather than just taking the photo again in the same conditions and hoping for a different result — that's the most common reason people get rejected twice.

The rejection reasons that require a full reshoot: shadows, wrong background, AI filter detected, photo too old, glasses visible, wrong head size. The rejection reasons that only require format correction: wrong file size, wrong file format, wrong pixel dimensions — these can often be fixed without retaking the actual photo.

⚠️ Note on AI photo tools: Some apps and websites advertise passport photo creation using AI background replacement. These are technically compliant for background swapping if they don't alter your face, but the US State Department has become increasingly strict about detecting AI processing in 2026. If you're applying for a US passport or visa, the safest approach is to take the photo against an actual white background rather than using any AI background replacement tool, regardless of what the app claims.

Frequently Asked Questions

What is the most common reason passport photos get rejected?

Shadows — on the background or on the face — are the single most common rejection cause for home photos. They're usually caused by standing too close to the wall or using side/overhead lighting instead of front-facing light. The fix is standing further from the background and facing a window or front-facing light source.

Can I take my own passport photo at home?

Yes. The US State Department explicitly permits self-taken photos. A modern smartphone rear camera is sufficient quality. The challenge isn't the camera — it's getting the lighting, background, and head positioning right, which is where most home attempts fail.

What background do I need for a passport photo?

Plain white or off-white for most countries (US, India, Canada, Australia). Light grey or cream for UK passports specifically — the UK is one of the few countries that rejects pure white backgrounds. Always verify which background your specific country requires before shooting.

Can I use AI photo apps or beauty filters?

No. The US State Department expanded its AI photo ban in January 2026 to cover beauty modes, portrait blur, skin smoothing, and AI-generated backgrounds. Automated systems now detect these modifications. Shoot in standard camera mode with all enhancement features off.

Can I smile in a passport photo?

The US allows a slight, natural smile with mouth closed and both eyes fully open. Most other countries require a completely neutral expression. The safest approach for any country: neutral, relaxed expression, eyes open and looking directly at the lens.

👉 Try our free Passport Photo Maker — select your country, upload your photo, and get the correct crop, size, and background automatically. Works for 20+ countries including US, UK, India, Canada & Schengen. No data stored.

Once your passport is sorted, you might also find our Image Compressor useful — particularly if you're submitting to portals like India's Passport Seva that have strict file size limits (under 300KB) that a standard phone photo won't meet without compression.
Comments (0)

  • Be the first to leave a comment!

Leave a Comment

Back to Blog